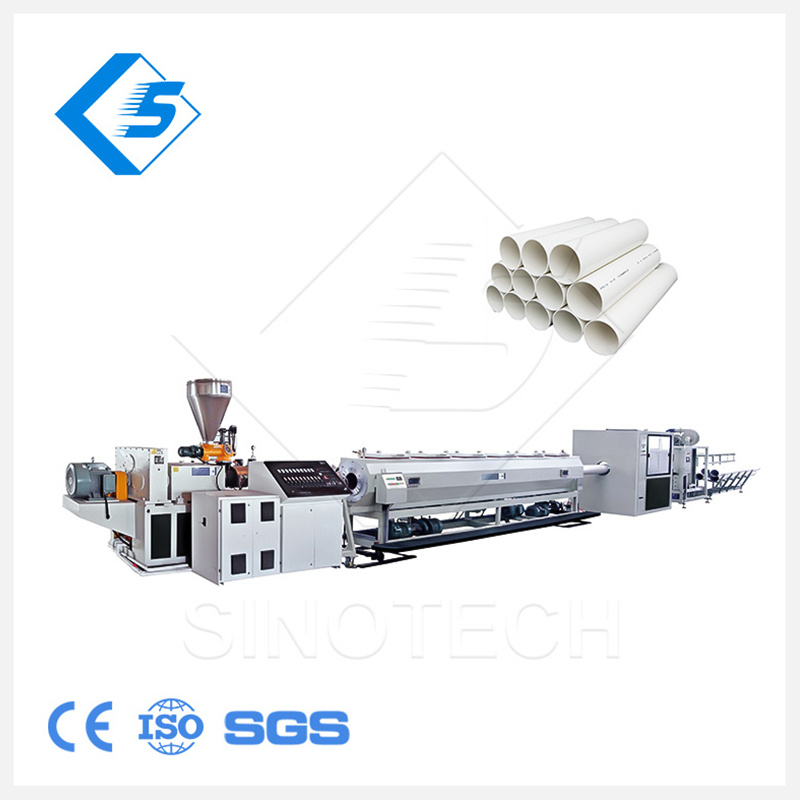
You are here: Home / BLOGS / How Do You Configure a PVC Pipe Extrusion Line for Different Pipe Diameters?
How Do You Configure a PVC Pipe Extrusion Line for Different Pipe Diameters?
Views: 0 Author: Site Editor Publish Time: 2026-08-20 Origin: Site
Configuring a production line for multiple pipe diameters requires a strict balancing act. You must carefully weigh daily production flexibility against overall machine efficiency. Frequent diameter changeovers often lead to high scrap rates and costly downtime if you configure the system poorly. No single extrusion setup optimally produces both 16mm electrical conduit and 630mm municipal water pipes. Attempting to stretch one machine across extreme dimensional sizes causes severe mechanical stress. It also ruins polymer integrity.
Efficient factory setup requires targeting specific, realistic size brackets to maintain tight manufacturing tolerances. We will explore a proven framework to help production managers and technical buyers effectively evaluate their equipment setup. You will learn how to configure a PVC Pipe Extrusion Line successfully. This guide ensures you handle varied diameter ranges smoothly without sacrificing product output quality or your facility's economic viability.
Key Takeaways
Configuring for different diameters requires synchronized adjustments across the extruder die, vacuum calibration tank, haul-off, and cutter.
Selecting the right size bracket (e.g., 16-63mm vs. 75-250mm) prevents material degradation and wasted energy.
High-volume, small-diameter production (like electrical conduit) is most profitable when utilizing a dual-strand configuration.
Evaluating a machine’s quick-change tooling capabilities is critical to calculating true overall equipment effectiveness (OEE).
The Engineering Reality of Diameter Changeovers
Understanding the hidden costs of switching pipe dimensions remains vital for production managers. When operators switch pipe sizes, labor hours accumulate rapidly. Purged material waste directly eats into facility profit margins. Machines require significant thermal stabilization time before they produce acceptable quality. You cannot rush the heating or cooling cycles during a changeover.
You must establish clear success criteria for any configuration. You should target changeover times under two hours for adjacent pipe sizes. You need a system setup yielding massive scrap reduction during startup phases. You must also ensure consistent wall thickness. This consistency guarantees Standard Dimension Ratio (SDR) compliance across your entire target diameter spectrum. SDR represents the ratio of pipe diameter to wall thickness. Maintaining this ratio prevents field failures.
Address the severe implementation risks proactively. Some facilities force a high-capacity extruder to run tiny pipe diameters. This mismatched approach creates excessive material residence time inside the barrel. The sensitive PVC compound stays heated too long. It eventually degrades, discoloring and burning inside the machine. You ruin the finished product and potentially damage the steel screw profile. You must match equipment scale directly to your dimensional realities.
Best Practices for Minimizing Scrap
Pre-heat spare die components in a dedicated oven before swapping them onto the extruder.
Document exact temperature profiles for every dimension in a central operating manual.
Purge transition materials using low-cost scrap resin instead of premium virgin compounds.
Essential Tooling and Die Head Configurations
Mold design directly dictates final pipe quality. It also determines how fast your team can switch manufacturing sizes. You must evaluate tooling features carefully before purchasing new equipment.
Rigid PVC processing requires highly specific spider die configurations. These die heads ensure optimal melt distribution across varying annular gaps. They prevent weak weld lines in the finished plastic product. Good spider dies balance polymer flow velocity perfectly. They distribute the material uniformly before it exits the machine lip.
Operators follow specific steps during pin and bushing swaps:
Unbolt the die face safely using heat-resistant protective gear.
Remove the existing internal die pin to change the pipe inner diameter.
Extract the outer die bushing to modify the pipe outer diameter.
Clean all flow channels thoroughly before installing new components.
Torque all mounting bolts evenly to exact manufacturer specifications.
Precision matters deeply during these tooling swaps. You must calculate thermal expansion accurately when machining or selecting these components. Compliance standards like ASTM and DIN demand exact physical tolerances at operational temperatures, not room temperature. Cold steel measures differently than steel heated to 190°C.
Die centering remains absolutely crucial for daily operations. You need easily accessible multi-point adjustment screws on the die head. These screws help maintain uniform wall thickness when shifting between sizes. They allow operators to micro-adjust polymer melt flow in real-time. Ignoring die lip cleaning during swaps serves as a common mistake. Even microscopic degraded PVC particles score the pipe surface, causing immediate quality rejection.
Adjusting Calibration and Cooling Systems
Vacuum sizing tanks dictate the final pipe shape. You must adjust internal vacuum pressure precisely based on both diameter and wall thickness. Thin-walled pipes require highly controlled, lower vacuum levels. High pressure pulls soft walls outward too aggressively or causes sudden structural collapse. Thick-walled pipes require intense water cooling to solidify their massive polymer volume quickly.
Calibration sleeves, often called sizers, maintain the exact outer diameter. Facilities typically use brass or stainless steel quick-change sizing sleeves. Operators must evaluate water ring designs against slotted sleeve designs. This decision depends heavily on expected line speed requirements. High-speed lines generally perform better using slotted designs. They provide superior surface lubrication and reduce friction chatter marks.
Consider the physics defining cooling chamber length. Larger pipe diameters demand exponentially longer cooling water paths. Heat transfers very slowly through thick plastic walls. You should configure modular spray tanks for maximum flexibility. These modular setups accommodate larger pipes seamlessly. Operators can simply bypass specific tank sections during smaller production runs. This smart bypass strategy prevents equipment from consuming unnecessary factory floor space.
Incorrect vacuum settings cause severe pipe ovality. This defect means the pipe becomes slightly elliptical instead of perfectly round. Ovality ruins the downstream fitting process later. Always maintain separate chilled water circuits for the calibration sleeve and the main cooling tank. This guarantees precise dimensional locking immediately after the material leaves the die head.
Synchronizing Downstream Equipment
Haul-off units, or traction caterpillars, pull the extruded material through your production line. You must scale traction force accurately depending on the product weight. Small pipes only need a simple two-belt caterpillar system. Larger, heavier pipes demand robust three, four, or six-belt setups. Extra rubber belts prevent mechanical slippage effectively. They also stop the traction unit from deforming the warm pipe by distributing pull pressure evenly across the circumference.
Variable Frequency Drives (VFDs) control these mechanical pullers. You need exact speed synchronization between the main extruder screw and the haul-off unit. This precise synchronization dictates final pipe wall thickness. A slight speed mismatch creates instant manufacturing scrap.
Cutting and socketing operations finish the extrusion process. You should configure planetary cutters for large diameters. Planetary blades rotate entirely around the pipe circumference. They cut deep into the plastic and chamfer the thick edge simultaneously without cracking the rigid material. Use high-speed guillotine or saw cutters for smaller sizes on a Plastic Pipe Extrusion Machine. These simpler cutters keep pace with rapid output rates effortlessly.
Adjusting in-line belling machines requires equal attention. You must swap heating mandrels and forming molds to match the new dimensions. Set them up carefully for U-type, R-type, or rectangular sockets based on client pipe specifications. Failing to heat the pipe end evenly before belling causes split ends and wasted product.
Specialized Configurations: High-Volume Small Diameters
High-volume, small-diameter production demands highly specialized manufacturing solutions. Dual-strand extrusion answers this specific market need perfectly.
You should configure a dedicated PVC Conduit Pipe Making Machine for electrical profiles. Running a dual-die or four-die head proves vastly more profitable for 16mm to 32mm electrical conduit. It works much better than pushing a single-strand line to unstable, extreme line speeds. Extremely high single-line speeds often cause surface tearing and calibration instability.
Evaluate the engineering trade-offs carefully. Dual-strand setups inevitably increase operational complexity. Operators must manage dual-calibration tanks simultaneously. They must monitor two separate haul-off units side-by-side. However, this specific configuration effectively doubles your total output capacity. It maximizes the extruder's core melting capability without risking material degradation.
Assessing Flexibility vs. Production Economics (Buyer's Framework)
Technical buyers need a structured framework to evaluate capital equipment investments. You must balance machine flexibility against raw production economics effectively.
Define your core product mix: Identify the specific dimensional sizes making up 80% of your total production volume. Configure your main extruder motor capacity and screw design specifically for this profitable sweet spot.
Group your remaining 20%: Organize smaller orders into logical changeover families. This strategy minimizes the need for complete die head tear-downs. You only swap specific tooling parts within a pre-planned dimensional bracket.
Evaluate OEM vendors rigorously: Base your final purchasing decision on their precise tooling packages. Ensure they provide reliable local after-sales support for complex machine calibration.
Factor compliance capabilities and return on investment into your final calculations. Consider integrating automated gravimetric dosing systems. These systems weigh raw material continuously. They feed exact grams-per-meter into the extruder feed throat. They cost significantly more upfront. However, they automatically adjust material feed when you change diameters or line speeds. They drastically reduce overweight pipe scrap. This automation guarantees regulatory standard compliance effortlessly while removing human error from size transitions.
Recommended Size Bracket Strategies
Target Bracket
Best Machine Type
Ideal Sizing Setup
Typical Changeover Time
16mm - 63mm
Dual-Strand Extruder
Quick-change slotted sizers
1 - 2 Hours
75mm - 250mm
Single-Strand Line
Modular spray cooling tanks
2 - 3 Hours
315mm - 630mm
Heavy-Duty Extruder
Planetary cutter & multi-belt
3 - 4 Hours
Conclusion
Configuring a production line for different diameters remains a deeply systemic engineering process. It is never just an isolated tooling part swap. The most profitable factories match their machine size brackets directly to their highest-volume sales demands. They refuse to force one machine to do everything poorly.
Follow these actionable next steps to improve your production configuration:
Draft a comprehensive product specification matrix before contacting equipment suppliers.
List your exact target diameters, required SDR/wall thickness, and expected output in kg/hr clearly.
Request custom tooling packages tailored specifically to adjacent sizes instead of browsing generic machine catalogs.
Train your operators thoroughly on required thermal stabilization protocols to prevent scrap.
Invest in quick-change calibration sleeves to minimize downtime during transitions.
FAQ
Q: What is the maximum diameter range a single PVC extrusion line can handle efficiently?
A: A single extrusion line operates best within a tightly bracketed range, such as 16-63mm, 50-160mm, or 110-315mm. Pushing equipment far beyond a standard bracket severely reduces thermal efficiency. It also compromises product tolerances and increases material waste.
Q: How long does it typically take to change pipe diameters on a standard line?
A: Setup changeovers usually range from one to four hours. This timeline depends heavily on your factory automation level. It also depends on whether you swap the entire die head or just the pin and bushing, alongside required thermal stabilization time.
Q: Do I need a separate haul-off machine for every pipe diameter?
A: No. Multi-belt haul-off units adjust easily within specific dimensional ranges. However, you must change the rubber block profiles or adjust the internal belt pressure to match the new pipe contour exactly to prevent slippage.
We are a professional manufacturer of plastic machines and we have devoted ourselves to the development, research, and production of plastic machinery for more than 20 years.